lunedì 26 ottobre 2015

Altered clock-Elegance is timeless

Lately I go very often to thrift stores, there are dozens here, as well as garage sales and Trash and Treasure markets: it's easy to find lovely and cheap pieces to alter. I got this old style clock (clocks are still my fave pieces to alter, here and here and here other versions)  and I also bought a lace curtain, maybe for 1$ to decorate the side:
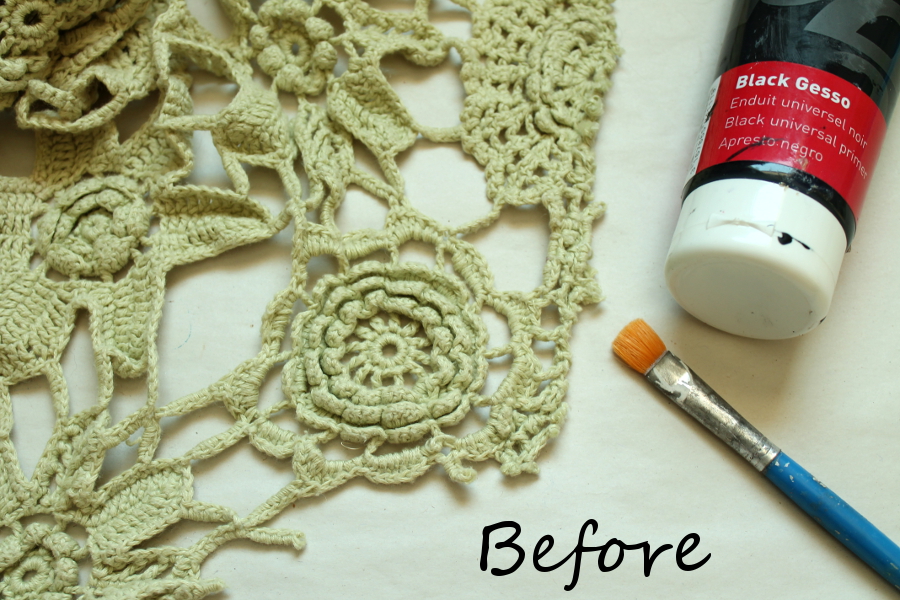
Qua i negozi dell'usato sono un vero e proprio business, senza contare i garage sale e i mercatini dell'usato, quindi trovare cose economiche da alterare è proprio facile, sono sempre a caccia. Ed ecco l'ultima sveglia in ordine di tempo, alterata con l'aiuto di un tendone di pizzo, forse pagato 1$ :-)
The dress is covered with mica flakes, gorgeous stuff, so shining.
I also made a matching card, with silver mica for the dress.
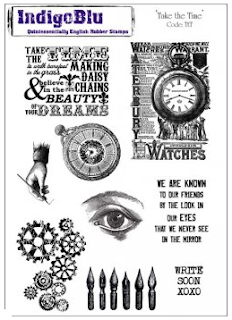
The stamp I used  CI-411 'Elegance is timeless' and CI-430
To make the clock and the card:
-Cut to size a circle from white cardstock
-Pour some mica powders on the non-stick mat and spray water
-Swish the cardstock on the mat
-Set aside to dry
-Clean the mat with a piece of lace
-Stamp using the CI-430 background stamp 
-Stamp the focal image from CI-441 on silk paper
-Tagliare misura un cerchio
-Mettere sul tappetino della polvere di mica in due diversi colori e spruzzare un pò di acqua
-Strisciare il cartoncino e lasciare asciugare
-Pulire il tappetino con la tenda
-Timbrare il cartoncino con CI-430
-Timbrare a parte il viso di donna con il timbro CI-441
-Color the image with Gelatos and a waterbrush 
-Cover the dress with glue
-Sprinkled it with mica flakes
-Mount the stamped images to the clock
-Glue the lace to the metal pieces
-Cover the lace with gel medium or clear gesso
-Colour the littlest piece with alcohol ink
-Mount the clock
-Add the sentiment and bits of lace to the front
-Colorare il viso con i Gelatos
-Con un pennellino ricoprire di colla il vestito
-Versare i fiocchetti di mica
-Assemblare sulla base
-Una volta smontata bene la sveglia, cominciare a  ricoprirla con il pizzo della tenda usando colla vinilica
-Colorare le piccole parti con alcohol ink
-Richiudere la sveglia
I participate on Love to create challenge 21

mercoledì 21 ottobre 2015

IB challenge: Spaghetti time

For the new challenge at the IndigoBlu challenge blog, 'Time flies' I upcycled a spaghetti box, perfect to make a matchbox that contains...an unusual brooch.
Per la nuova sfida sul blog della IndigoBlu  questo mese ho riciclato una metà di scatola di spaghetti, ed un pezzo di centrino.
I started here:
For the brooch I painted a crocheted flower with black gesso
Per la spilla:
After:
Here some steps, how I made the matchbox
Facilissima da costruire la scatolina:
I used this gorgeous plate from IndigoBlu:
There's a month to participate and you can win a fabulous prize: you have 3 options to choose from: 1: 2 Large stamp plates or 
2: 4 Small stamp plates or 
   3: 1 Large and 2 small plates

martedì 13 ottobre 2015

Lindy's black AJ page

It was ages since I participate on a challenge. It has been a good excuse to use my favourite mists and try my new black journal. It was in the kit form the Visual Art course I am attending, we've never use it, the size is gorgeous, so huge, unfortunately the pages are thin, so no good to take lots of medium. Anyway, I gave it a chance. The challenge is  the color challenge on Lindy's Gangs sprays:
Era una vita che non partecipavo ad un challenge, il color challenge dei colori spray della Lindy's, fantastici! Volevo poi provare il mio nuovo artjournal nero, misura fantastica, ma le pagine troppo sottili, peccato.
These are some steps: I started with an image from a magazine, I traced out the shape, and covered the shape with a layer of gesso.
Alcuni passi, una pagina molto semplice. Ho ritagliato l'immagine da una rivista e l'ho trasferita con il gesso
I put face down the image and make sure to adhere perfectly.
Rollato ben bene per togliere le bolle d'aria.
When dry I sprayed some water and start to peel the paper to reveal the image.
Quando perfettamente asciutto ho spruzzato dell'acqua e cominciato a spellare. 
I added some tetxure with a stencil mixing the embossing paste with some drops of mists.
Ho aggiunto della texture aggiungendo delle goccie di mists alla pasta da embossing.
I highlighted some details with the mists and a waterbrush.
Ho colorato delle parti, le labbra, gli occhi con i colori dalla bottiglietta.
I sprayed the background with the mists.
Ho spruzzato lo sfondo qua e la' con gli spray.
I glued some bits of laces
           -Ramblin rose pink
           -Hydrangea blue 
           -Sweet violet purple teal

I think this page fits also the challenge at Love2create:anything creative mixed  since I 'redraw' the face with PanPastels.
E a proposito di ArtJournaling sull'ultimo numero di CraftStamper c'e' il mio primo articolo, una pagina di ArtJournal su canvas :-)
And speaking about ArtJournaling, I have my very first article on the latest issue of CraftStamper magazine, and it's an ArtJournal page on canvas. Yuppeeee :-)

venerdì 9 ottobre 2015

TIMI and Bookbinding: A junk-book

Inspiration post at TIMI, where the theme is ''Ink Stitch Paint Collage Print Paper' (and stamping, of course)! And after the vintage-ish, Parisian ATB, I return to my colourful style.
Lately I am a little bit overwhelmed by the junky I am collecting: boxes, papers, leftovers, fabric, don't really know where to stuff all these things. So I decided to make a junkybook, with a 'proper' binding made with the tons of papers and fabric I collected during the Printmaking course at school.
I wanted to follow this tutorial, but at the end I was too lazy and I strectched it a little bit, and no plastic bags involved...I took some pictures, but just to give you an idea, I advice you to follow one of the dozens tutorials you can find on Pinterest.
Secondo post del mese su TIMI dove il tema è 'Ink Stitch Paint Collage Print Paper' e timbri naturalmente! Io, con tutta la monnezza che colleziono freneticamente ho realizzato un junk book, cimentandomi persino nella rilegatura. Il tutorial che avrei voluto seguire era questo, ma poi ho un pò deragliato, e me lo sono inventato diciamo. Comunque su Pinterest si possono trovare tutorial fantastici.
Collect some papers and cardstock
Armatevi di cartoncino di recupero e avanzi di carta vari
Tear the papers to size
Strappate la carta a misura
Fold them in half
Piegate a metà
Use a poking tool to make 3 holes along the fold
Fare 3 forellini sulla piega
Stitch with a large needle
Cucire con ago e spago
Make a knot and with the same thread start with the second one
Fare un nodo e proseguire con lo stesso filo sul secondo
Make a knot and add all the pages
Chiudere con un nodo e proseguire con gli altri fogli
Link the lower binding with another thread
Legare insieme la parte inferiore con un altro filo
Add the cover
Incollare la copertina
Glue some fabric strips to the cover
Utilizzare delle striscioline di stoffa per decorare la copertina
Stamp the focal image on a piece of fabric
Timbrare l'immagine su della stoffa
Add to the cover